REVIEW: Halo 3
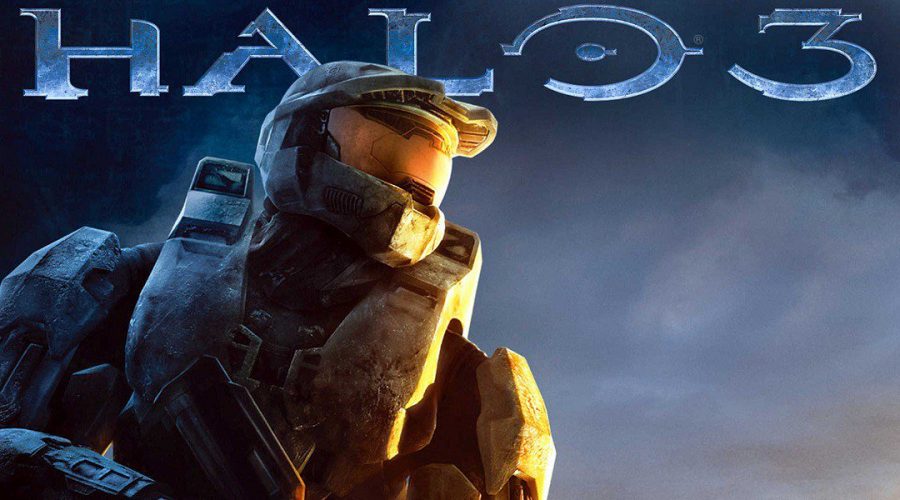
Halo 3 is a first-person shooter videogame that was developed by Bungie for the Xbox 360 console. This game is the third installment in the Halo franchise and part three of the Halo story. The story is about a war between two factions, the UNSC (United Nations Space Command) and an alien faction known as the Covenant. this was the first game of the halo series that I played and it became one of my top favorites.
After the second game was finished, the Elites faction of the Covenant join the UNSC after learning of their leaders’ betrayal and brutes. The last leader of the covenant is known as the Prophet of Truth. The main character you play as is Spartan 117, the best soldier in the UNSC, also known as the Master Chief. The campaign has 10 missions total, that starts off easy, but gets harder as you complete each mission.
After a failed attempt to kill Truth, the game begins with the Chief crash landing in Eastern Africa, where he is found by Sergeant Johnson and the Arbiter. He tells Johnson that his Artificial Intelligence, AI for short, Cortana stayed behind after the second games ending and he promised to save her, because she knows the solution stop the Covenant and the Flood without firing the remaining halo rings. Once everything is in order, the UNSC and the Elites take the fight straight the brutes and the Prophet of Truth and the Flood.
I like playing all 10 missions, and I will describe them.
Mission 1 Arrival: Is a visual test for the Chief just to make sure he’s good to fight.
Mission 2 Sierra – 117: you fight your way through the jungle to the first landing zone for pickup against the brutes, but your pelicans get shot down by two Banshees one ends up going in the ocean. The other one that had your sergeant aboard crashes a few miles past the landing zone in the jungle, and you need to find the crash site and save your Sargent. The only problem is that after find the crash pelican, your Sergeant is already captured by the brutes and you need to rescue him.
Mission 3 Crow’s Nest: you arrive at an underground base and meet up Lieutenant Commander Keys and get briefed on a plan an attack with Lord Hood against Truth’s army. Then the base gets attacked by a large force of brutes, grunts and jackals, meaning it’s time to evacuate. Your job is to clear the base and secure the hanger bay. Once that’s done you return the Ops center and learn that brutes have attacked the barracks and trap some of the marines’ inside. Your next task is to head for the barracks and save those men. You first encounter a brute force led by a chieftain. The chieftains are tough brutes because they carry a weapon called a Gravity hammer and its impact can be dangerous, just one or two direct hits and your dead. Usually you need to kill the brutes in front of the chieftain before it attacks you, but it you get close enough it will charge at you. As for the mission, after you take out those brutes, you then meet up with the arbiter and enter barracks, just as the brutes are about to kill another soldier, you can step in and kill them, saving the marine. Then you round up the remaining marines and clear out the barracks. Once that’s done, head for the landing pad outside the barracks, but you encounter jet pack brutes. Kill them to clear the landing pad, after that Sergeant Major arrives and informs the commander that brutes took the Ops center and disarmed the bomb set up to destroy the base. Your then sent back the ops center alone to kill those brutes and re-arm the bomb. After the bomb is re-armed, head for the service elevator in the hangar to escape.
Mission 4 Tsavo Highway: After you make it safely to the elevator, the bomb explodes and you find yourself in the caves under the base with some surviving marines. You need to head through the caves and out into the open, re-establish contact with the commander, and put some distance between you and base. You encounter heavy enemy forces as you precede. Once your connection is re-established, you need to assist some marines in the valley. After that your given two warthogs to push through the enemy armor to reach the town of Voi, when Truth ship is located.
Mission 5 The Storm: Your job is to retake the city, and punch a hole in Truth’s defenses so Lord Hood can start his attack run. Your first task is to destroy an Anti-Air Wraith in the first area, and then destroy two more in another area along with brute heavy armor. The good thing is that you team up marines riding mongoose four-wheelers armed with rocket launchers. Once you neutralize the armor, your faced with a difficulty challenge. A Covenant Scarab Tank shows up and begins attacking. Your task is to find a way to take the scarab down using rockets and missiles. A scarab tank is not easy to destroy. Its armor is impervious to all weaponry, but he has one weak spot, his legs. This can be done in a few ways. One, using a mongoose ATV, with a rocket marine on the back, drive around the scarab while the marine tries to shoot out a leg to get the scarab down. Two, using a missile launcher pod near the crane to target the legs. And three which is my favorite, using the cranes. Go up the cranes elevator either on foot, or with an ATV and once the scarab is in place charge off the cranes arm at the right speed and land on the scarabs back. Once you’re on the scarab look for it power core and blast it, destroying the scarab. After that your final task is to destroy a covenant AA gun that’s preventing Lord Hoods strike, once the gun is destroyed, the attack begins.
Mission 6 Floodgate: It’s a short mission, but it will be tough. After Lord Hoods attack on Truth’s dreadnaught fails, a portal opens and heads to a place called the Ark, which is the location where Truth plans to activate the remaining Halo Rings. After Truth’s dreadnaught and the other brute ships head through the portal, a badly damaged covenant ship comes out of slip space and crashes near the factory complex, and to what makes it worse, the ship is infested with the Flood. The Flood is a dangerous species first introduce in Halo Combat Evolved and Halo 2. The Flood in this game means the Dead Reincarnated or known to the covenant as the Parasite. They’re controlled by a single monument known as the Gravemind. The Gravemind is first encountered in its real form in Halo 2 and later again in Halo 3 as a voice background. The infection forms of the flood have the power to infect every species in the game. That means they can infect the marines, brutes and elites regardless if they’re dead or alive turning them into combat forms, except for the Chief, Arbiter, grunts and jackals. And I can tell you this, the infection transformation is very disturbing. The pure forms of the flood are forms created from an entire flood biomass. These forms consist of Stalkers, Ranges, and Tanks. The stalkers are the ones that can scale walls and change into these other two forms. It’s just as bad as an infected host transformation. Any weapon in the game can kill them, but it depends on how much ammo it takes and how strong it is. The best UNSC weapons to use against the flood are the shotgun, sub machine gun, rocket launcher, the Spartan laser and the flamethrower. As for the covenant weapons against the Flood the best choices are the plasma rifle, the needler, the carbine, the brute shot, and the energy sword. All the grenades work well too. Going into the mission your task is to head back into the city, find the crash site and overload the ships engine core, but the task changes later in the mission. As you head for the crash site you encounter many flood combat forms. Later you meet up with the arbiter’s elite brothers and then encounter the new pure forms. You then learn that Cortana is on the crashed flood ship and your task is changed to retrieving her. Once you reach the crash site, the arbiter and the elites stay behind to guard the entrance as you enter the ship to find Cortana. When you find her, it’s just a message, then the monitor 343 Guilty Spark shows up to repair the device. Cortana has a solution to destroying the Flood without the rings firing. The decision made was to go through the portal to find her solution. Lord Hood remains on earth to hold out against the threat while commander keys, sergeant major, and Chief go through the portal.
Mission 7 The Ark: After going through the portal, the UNSC and Elite forces arrive outside the Ark and come across Truth’s brute fleet and engage in combat. While the battle space goes on, the UNSC deploy soldiers to the surface to secure a landing zone for the UNSC Forward Unto Dawn so the commander can land reinforcements. As you fight your way on the ground you come across a group of marines that escaped and crashed a pelican and spotted a good LZ. Before heading to the LZ two brute prowlers arrive and you have to stop them. As you make your way to the LZ you encounter brute forces and light armor. Once you reach the LZ, you need to clear the hostile anti-air defenses before the dawn can land. When the dawn lands you’ll be in for a surprise. After the dawns under hatch opens, a couple warthogs and tanks come down the ramp and your joined by the monitor. The monitors part in this mission will be to pry open any locked doors. Your new task is to locate the Cartographer, which is located on the other side of wall and guarded by the brutes. It takes one of the scorpion tanks to reach the wall, it’s the best way to break through the enemy armor. Once you reach the wall, park your tank on the lower door and then head to the upper doorway. As you enter the upper part of the wall, your armor enters the lower part. In the middle of the wall you need to activate an energy bridge for your armor to cross, once that’s done the first fun part starts. As you exit the wall a Scarab appears and more brute armor is blocking the way. Your given command of the armor, and take the wheel of the warthog with a Gauss turrent. Assist the armor in destroying the Brute Wraiths and Choppers, then take down the Scarab. Once the Scarab is destroyed, meet up with the Arbiter on in the next structure and find the Cartographer. After finding and activating the cartographer, you learn of Truth’s location, and head down a level for pickup, but you have to fight a pack of cloaked brutes first.
Mission 8 The Covenant: After discovering Truth is located in Citadel, the Elites and the UNSC launch their final attack against the Covenant loyalists. This will be your final mission to take down the Prophet and the remaining covenant loyalists so it will be difficult. You find out that there is a barrier controlled by three generator towers and your task is to deactivate them to bring down the barrier. While you head for the first tower, the arbiter and elites deal with the second tower, and Sergeant Major deals with the third tower. Once towers one and two are darkened, it appears that Johnson team is unable to deactivate the third tower, meaning something has gone wrong. Now it up to you to deactivate the tower. You head out of the tower and back to where you landed and two hornets will arrive, your task is to provide air cover and escort commanders Keys pelican to third tower. This will put your piloting skills to the test as you will need to shoot down a phantom and several banshees in the process, as you approach the third tower, there are three wraiths guarding the entrance, two anti- air wraiths and one normal tank wraith. The ally phantoms can’t land the arbiter and elite allies until you take out the anti-air wraiths. Take all three wraiths out with your hornet, and entering the tower will be much easier. This tower is full of brutes, so be careful and watch out for the hunters, they’re hard to kill unless you find a gap in their armor. Once you reach the lift, take to it to the top, there will be a cloaked brute squad waiting for you and a chieftain. Take out the brutes and deactivate the tower, then the barrier will fall. With the barrier down, the ship masters assault carrier gets into position to bombard the citadel, but before it can attack, a slip space portal appears and out comes the Covenants Holy City High Charity, which was taken over by the Gravemind after the second Halo game. As it passes over the carrier, dispersal pods fall from hitting the carrier and disabling its weapons. Then a pod breaks through the tower screen and out comes some flood combat forms and infection forms, you need to deal with the attacking flood. Once you’ve dealt with the flood attack, it’s time for your final attack on the Citadel and stop Truth. After heading back outside the monitor and the arbiter board an elite phantom to access the damage to the Ark after High Charity crash landed on the Arks surface, while the remaining elites join you and a few marines for the final push towards the Citadel. For this you are given a choice of driving one of three vehicles, a Mongoose ATV, a Warthog with a Gauss turrent, and a scorpion tank. I always take the warthog and only let the elites join me. The scorpion tank may be stronger, but the Gauss Turret’s shots are strong to. Now comes the final attack. Before you mount up for the attack, you receive intel that Jonson was captured by Truth’s forces and is being held in the Citadel. Your objective is make your way Citadel as fast as you can through the cliffs and take out any covenant forces you encounter. As the Citadel comes into view, the brutes mobilize everything they’ve got to try and stop from getting through. Fight and drive your way to center cliff in front of the citadel, where two hornets will land, you can then pilot one of the hornets to destroy the rest of the brute armor or continue drive the vehicle you chose. Whichever way you chose, your final obstacle to face before entering the Citadel is two scarab tanks. Destroy the tanks, and then you can enter the Citadel with the Arbiter and find Truth. After ending the Citadel, it turns out that you’re not close enough to Truth. The surprising part in the final part of this mission is after you and the arbiter reach the floor of the Citadel. Two flood tanks drop from above, but then the grave mind speaks through them and this is what it says, “Do not shoot, but listen! Let me lead you safely to our foe. Only you can halt what he has set in motion”. Then a bunch of infection forms crawl past you. Turns out after Truth activated the Arks rings, the Flood is temporarily helping you fight your way through the last of the covenant forces to Truth. You’ll find this to part to be strange, but useful. After killing the last of the covenant loyalists, you find your commander is dead. Angered so roughly, the Arbiter then stabs Truth in back, killing him and the Chief shuts down the rings, which finally means the covenant is finished. Then comes a scary part, the Flood appears again, and attack you, shutting down the rings and putting the Flood against you. Your objective now is to escape the Flood. After jumping down the lift shaft, the Chief activates a panel and then an incomplete ring emerges from the fog and rises into the skies, then the Monitor appears. The incomplete ring is a replica of instillation 04 from the first Halo game. The Chief decides that he’ll light the ring to finish off the Flood. The Arbiter asks how, and they both look and see the crash site of High Charity.
Mission 9 Cortana: The answer to lighting the replacement ring is the activation index from the first Halo ring that Cortana still has from the first Halo game and she stayed behind in high charity after the Chief went after Truth, then the gravemind took over. This mission goes well in cooperative gameplay, but the story is single mode. The mission opens up with the Chief flying a banshee to high charity, which has now become a hive for the flood and the gravemind. He lands at an entrance to the hive and jumps in. After high charity was cleared out in Halo 2, the gravemind arrived and turned it into his hive. The inside of the hive is just like the crashed flood ship in the floodgate mission, only this time you’re inside the prophets infested holy city. This level is really scary for first timers because all you battle in this mission is Flood. Your task is to search High Charity for Cortana and kill any and all Flood that stands in your way. One thing to be careful of in this mission are Flood growth pods. The Flood growth pods are large, spherical collections of biomass that grow on the surfaces of ships, buildings and structures. They start to form when mass floods form or flood spores enter a certain area. They incubate developing infection forms and are only seen during stages of advanced Flood infestation when a gravemind has formed and consumed enough biomass to support the pure forms. What makes these pods more dangerous is that they can burst open at any time and release the infection forms in them. As the infection forms developed the surface of the pods move around like a new baby animal hatching from an egg, but in a more disgusting way. These pods are seen everywhere you go as you advance through the hive and the one thing you don’t want to do is shoot them. One hit from any gun and the pod will burst open. Going back to the mission as you make your way through the hive the gravemind wants to know why you’ve come to high charity and figures out that you came for Cortana. Throughout the mission until you find Cortana the gravemind will continue to speak and Cortana’s spirit will appear and speak to you and as it continues you like Cortana is dying and you need to hurry or that her mind has merged with the gravemind’s mind. As you press on, the amount of flood forms you encounter become harder to take on unless you can find some better weapons to fight with. Once you reach the reactor room you have to find an operational door that will take you down a long corridor through two hallways. In the first hallway comes a moment of Cortana experiencing rampancy again, and a gravemind moment. In the second hallway is another Cortana moment, “this is UNSC AI Serial Number CTN 0452-9, I am a monument of all your sins”. This is same reference to when the Chief and Cortana first met the Gravemind in Halo 2. The last door opens and you are in a chamber that was the Sanctum of the Hierarchs before the Flood took over. Right in front of you in the center of the chamber is small podium with a stasis field and in it you find Cortana lying prone. Melee the stasis field and Cortana will be free. Now comes the second part of the mission, shoot your way out. Now that you’ve got Cortana back, you need to return to the reactor room. Before leaving you need destroy High Charity. To do this you need to start a chain reaction in the reactor by destroying the reactor pylons. Once you destroy the pylons, GET OUT OF THERE. You need to head for the pelican you came across earlier in the mission. Make your way back through the hive, killing any Flood in your way. Before you reach the pelican you come across the Arbiter fighting the Flood with a flamethrower near the pelican. Help him kill the remaining Flood, get in the pelican, and you both escape just as the reactor reaches critical mass and High Charity explodes.
Mission 10 Halo: It’s been one heck of a fight, but the war is nearly over, with the death of Truth and the remaining covenant loyalist killed and the destruction of High Charity, you and the Arbiter in the pelican head for ring, while the shipmaster takes the elites and marines through the portal. The ring is right over the Ark, and Johnson is landing the Forward Unto Dawn frigate on ring to meet up with you at the control room. Once you reach the surface, head for the control room. When you reach the bottom of the tower, Flood dispersal pods begin falling form the sky. The gravemind is still alive and is trying to stop you from lighting the ring. Head for the top of the tower but be careful. Not only are there combat forms on the tower, but stalkers are scaling the walls and will attack at any time in any form. Luckily Sergeant major is heading along the cliffs providing cover for you with a Spartan laser. Once you reach the top of tower, the door to control center is closed and the monitor is inside, then a flood army appears and you need to kill them all before monitor opens the door. Once the Flood forms are killed, the door opens and you, the Sergeant and the Arbiter head for the control room, then the gravemind speaks. Turns out after destroying High Charity, the gravemind is trying to rebuild itself on the ring, meaning you need to find the control room quickly. Once you reach the control room comes a cut scene. The door behind you closes before the Flood reinforcements attack you. Then the chief hands Cortana to Johnson and walks over to the panel, then the monitor comes down and say the ring should be ready to fire in a few more days, but you don’t have a few more days. Johnson tells the monitor to deal with the Arks destruction, and then monitor turns red and shoots Johnson with his energy beam turning on them. Now you need to kill the monitor with Johnson’s Spartan laser. After a few direct hits the monitor explodes, Johnson dies and Cortana activates the ring. Now comes the second part of mission getting off the ring. You and the arbiter have to head through the cliffs and find the Forward Unto Dawn’s landing site. After making it through the cliffs you find the warthog Johnson used to reach you and now comes the fun part and final objective. Put the Pedal to the Medal. Drive the warthog while the Arbiter operates the turret across the ring all the way to the frigate. Flood and sentinels will be everywhere so ignore killing them because this is a race against time, even though there’s no timer. Once the back of the Dawn comes into view give the warthog all its got to make the jump and land in the hanger. Then comes a cutscene of escaping through the portal and the game is finished.
This game gave me an experience I never had before in the various games that I’ve played. I was challenged in every game in this series when it came to completing each mission, fighting certain enemies, and getting stuck on certain missions.
It took me awhile each time, but I managed to figure it out. My first encounter with the covenant in Halo’s one, two and three I could handle without a problem, but when I came across the Flood, then I was terrified, especially when they got too close especially the carrier forms because when killed they explode releasing a lot of infection forms.
Lucky for me, I got over my fear of the Flood after I completed the Cortana mission in Halo 3 on my own, but I was still careful when carrier forms appear by shooting them from a distance. The stalkers were just as bad because of the sound they made in range form or stalker form and the speed of their attack, but I can handle them now.
So if you have the console for this game, then buy not just Halo 3, but the others as well. It’s your turn to join the fight against the covenant and the Flood, so rise up, play as the Master chief, and stop the rings from firing.
The fate of Earth rests in your hands.












Matt • Sep 23, 2019 at 8:02 pm
Halo was truly special.
I remember it was a huge deal back in 2007. I skipped so many days of school to play Halo 3 & Reach on Xbox Live xD